MORE FLYING TRASHHHHHHHHHH
MWMR : Class 06 : Final Project Proposal
FLYING TRASHHHHH
MWMR : Class 05
Class 05: Theme: Storytelling and navigating the physical space like turning pages in a book. T
ech: Tango, motion tracking, aArea Learning
CONCEPT
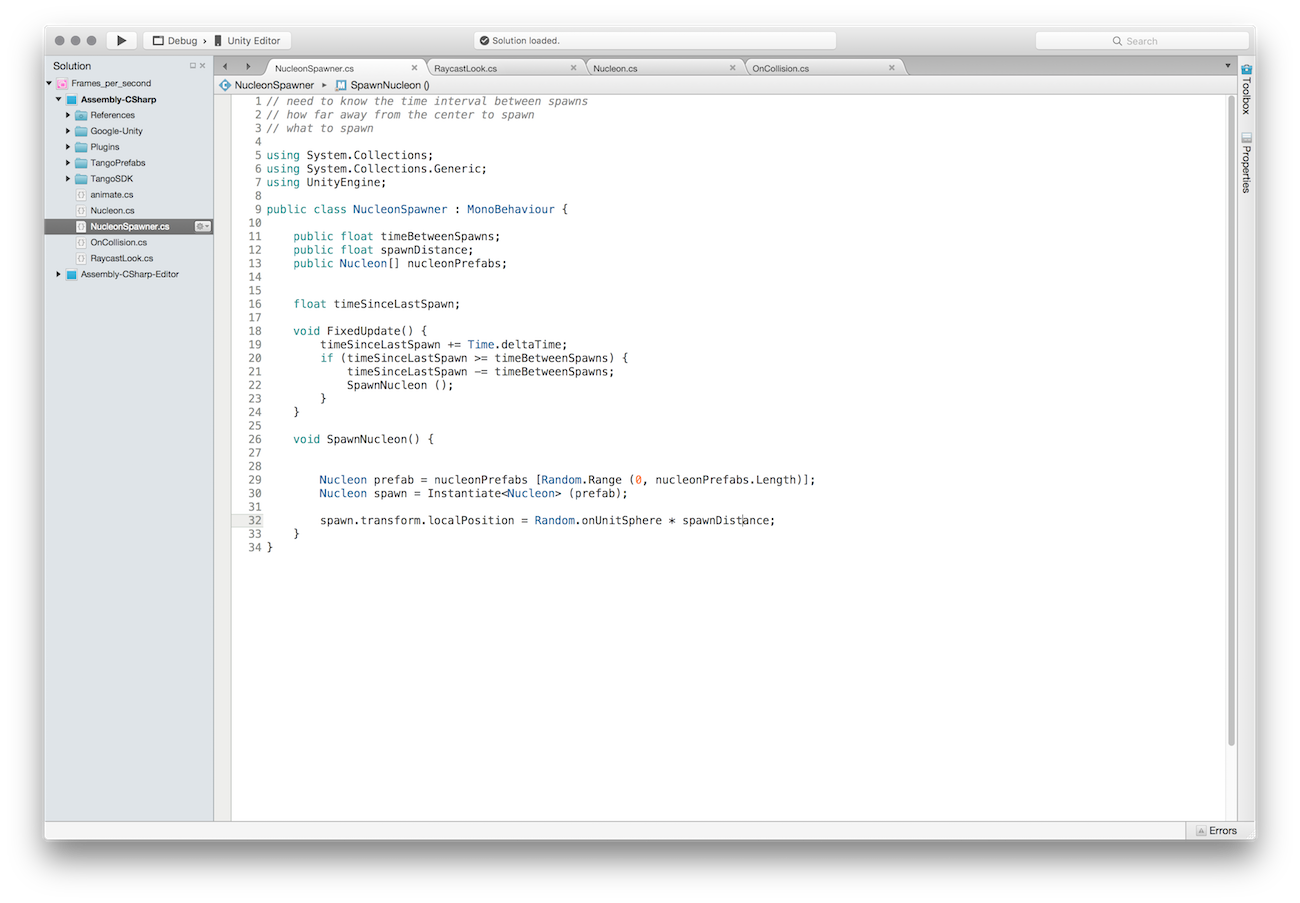
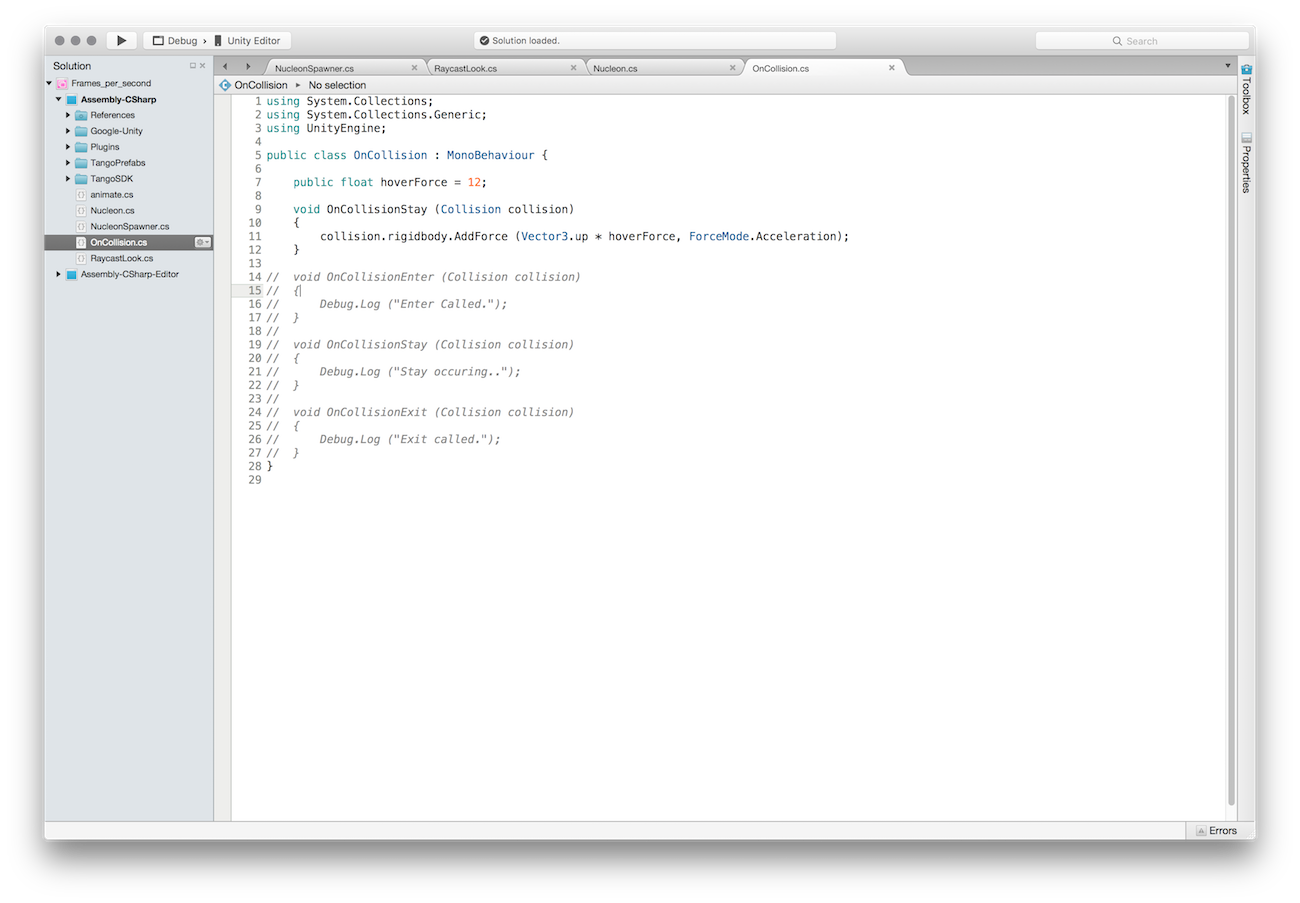
I have been fascinated with physics engines since I took a class in Nature of Code. My idea for this week is to have these particles follow my body/tango as I move in physical space. So I will always attract them. As the blue spheres start to block the player's point of view, the player can shake or jump or make any sudden movements to set free or run away from the spheres. I really like the effect of the explosion of the hidden mesh smash into the blue particles.
The problem I have right now is that I couldn't get the blue spheres to be the child of the camera. I thought that by putting the spheres 3D object within the Tango camera in the hierarchy would do the job but nope.
Playing with blocking point of view of the player.


IN THE TANGO
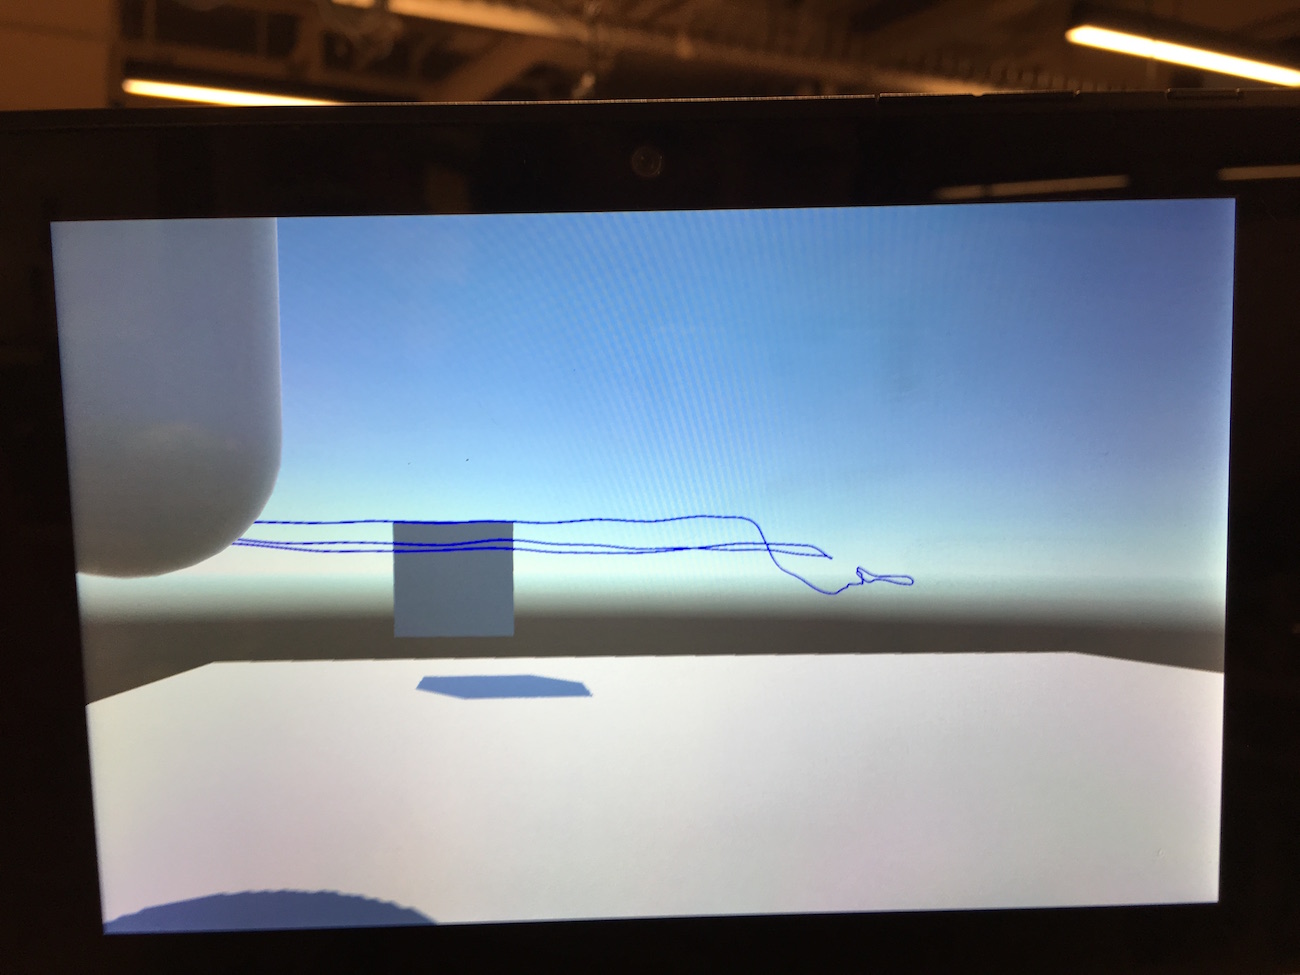
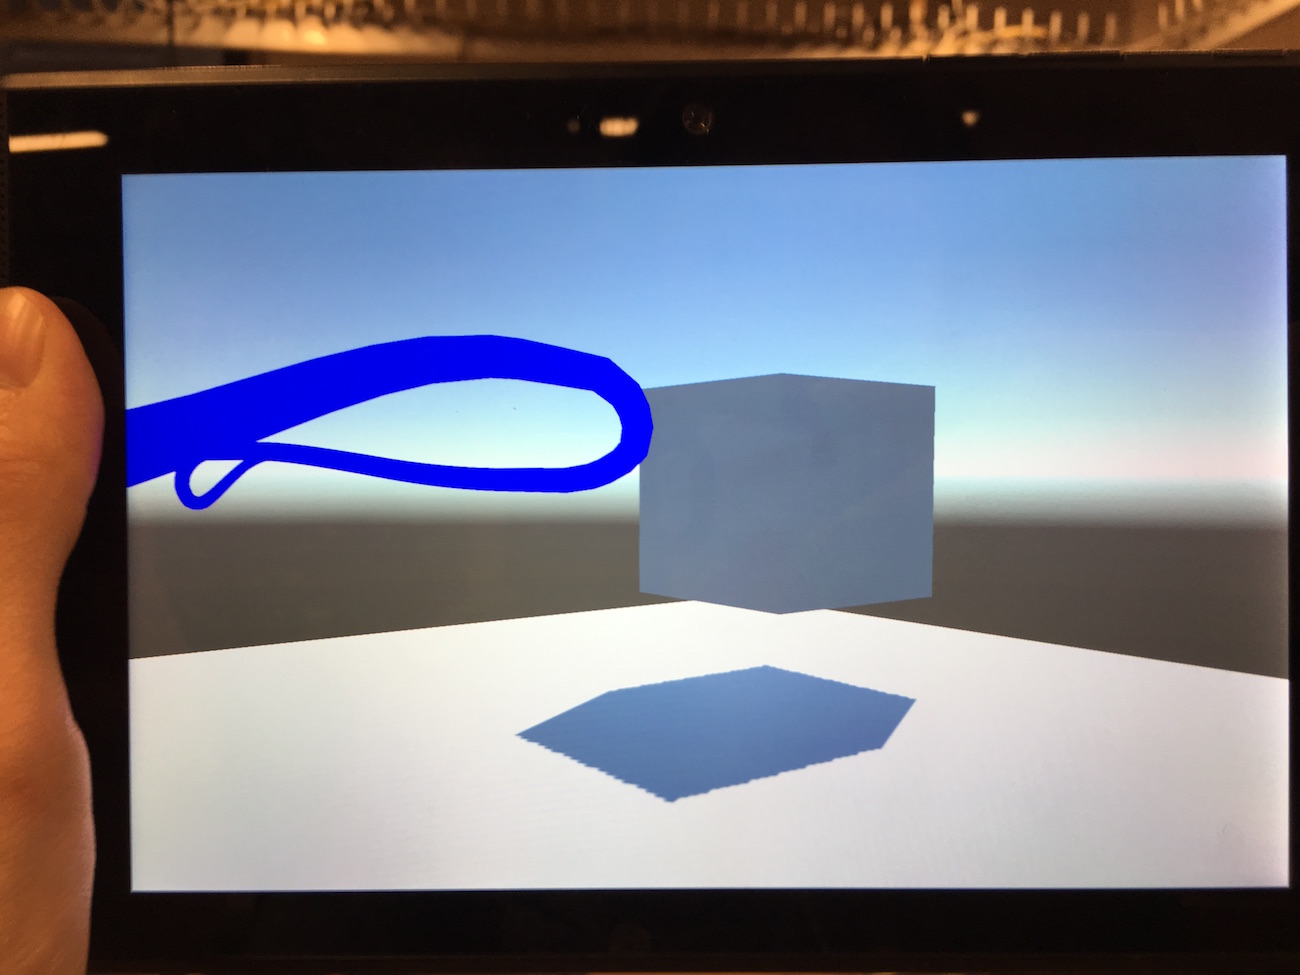
So Happy I got the app to successfully work in the Tango! Im using the new Lenovo one. I also tried my app with the old Tango and I found that the app crashed and was slower.
Right now, what my app can do is to run and smash those blue spheres as hard as I can.
One more thing....
It took me long time to find the route of the SDK path so I just want to note it here to myself to remember.
Android Studio > Preference >

MWMR: Class 04
Class 04: Theme: Story Telling and Navigating the Physical Space like turning pages in the book.
Tech: Tango, Motion Tracking, Area Learning
I was able to build the Motion Tracking example working on the android (the past week I couldn't even get the examples working....)but I came across this ERROR (snap shot below) 3 out of 5 times.
Now I think for me to get the most out of motion tracking is to know where and which line codes to create and manipulate. I went through the youtube tutorials that you sent me, I feel much more comfortable navigating through the unity interface.


MWMR: Class 03
Class 03 | Assignment Theme: Augmented space & new paradigms in social interaction, public space and privacy.
Tech: SLAM (simultaneous localization and mapping) Geolocation + Unity + Vuforia


The snapshot photo below is what was needed to add to get the geolocation app working in iphone.

*** THE MOST IMPORTANT LINE FOR GEOLOCATION
TO WORK ON IPHONE ***
I just can't seem to get the example to work...... What I felt before you sent the fixed geolocation code. Frustration Level: MAX
MWMR: Class 02
Class 02 | Assignment Theme: Mixed objects, animism and invoked computing.
Tech: Image & Object Recognition
A couple of days ago, JJ, a classmate have shared me an amazing step-to-step tutorial on "Unity3D & Vuforia". This was really helpful for this week's assignment to get me started. >>> LINK
I know that the step is similar to what you showed in class and I also find what you showed in class very helpful, although I have to admit that I could not catch up and follow along. I think I prefer to focus on what's happening on screen (unity has a lot of interface on screen) and listen on your explanation and try to follow along as much as I could but then do these steps later on with the tutorials link that you sent was better for me. I find that having teachers show the overall concept and do the technical things at my own pace is how I learn best.
Sehyun Av Kim, the guy who made the tutorial was also an ITP alum! He only posted the tutorial a few days after our Mixed Up Realities 2nd class.
I started off by making a simple image recognition and a sphere. Even I'm following the tutorials, it took me a few tries to get the ball to show on the screen. Hmmm....don't know what I did wrong though and pretty sure I followed all the steps accordingly.
I went online to get a QR Code. QR Code Generator LINK.
After, I got the sphere to appear on an image I wanted to use a more interesting 3D animation so I dived into the Unity's world, the beginners tutorials to get me started and here is what I could do do far.....
I found a free Golam creature in the Unity's Asset store to put in the scene and a rocky photo from google images.
He looks a bit lonely standing there by himself, so I added a spider and a butterfly.
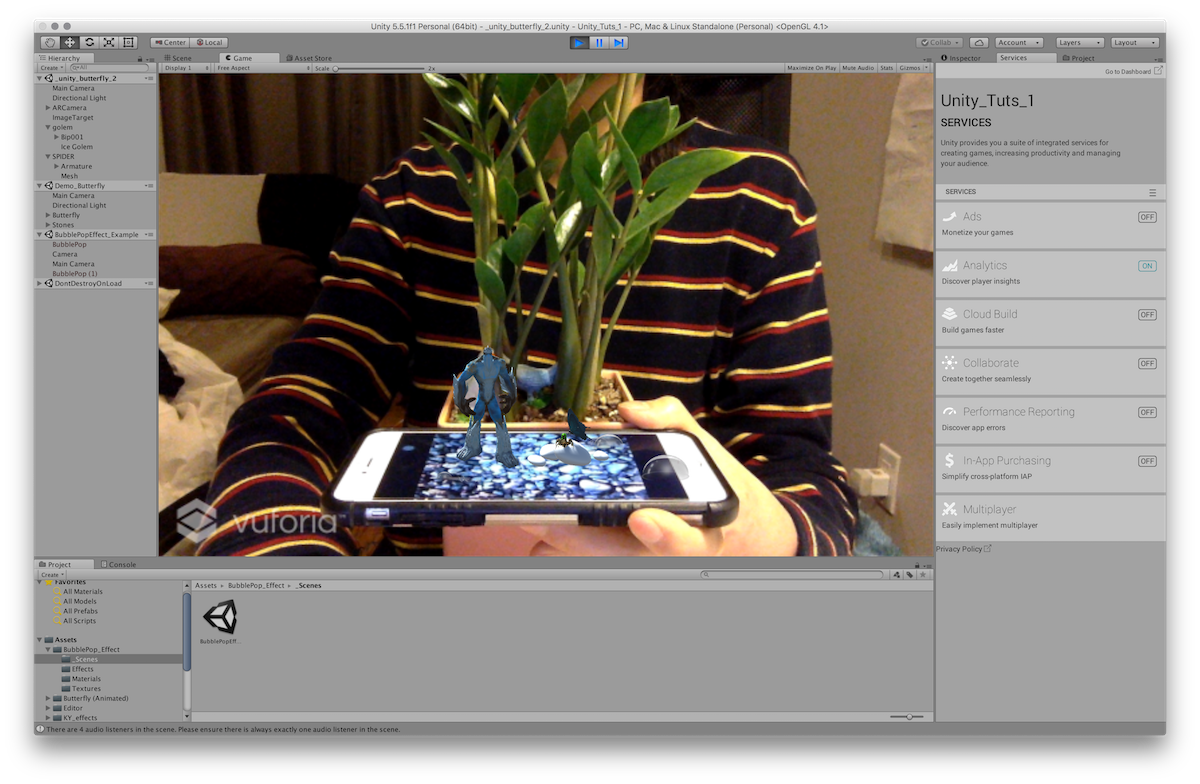
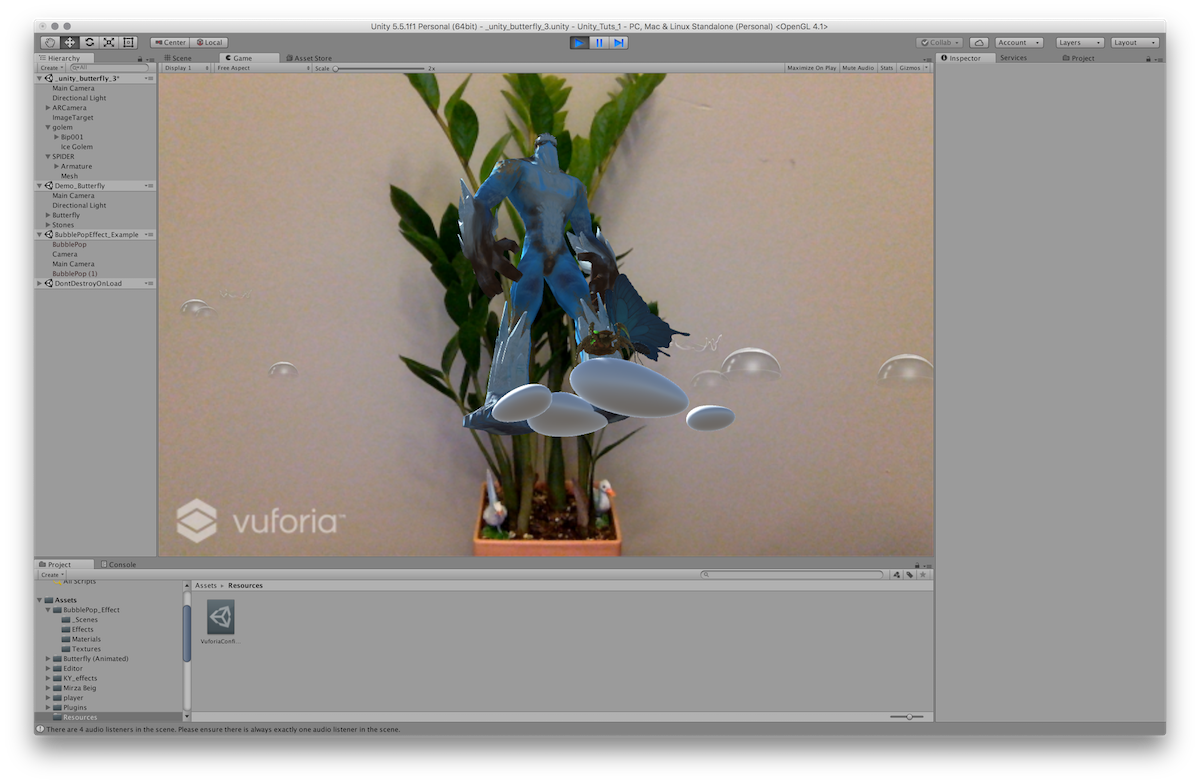
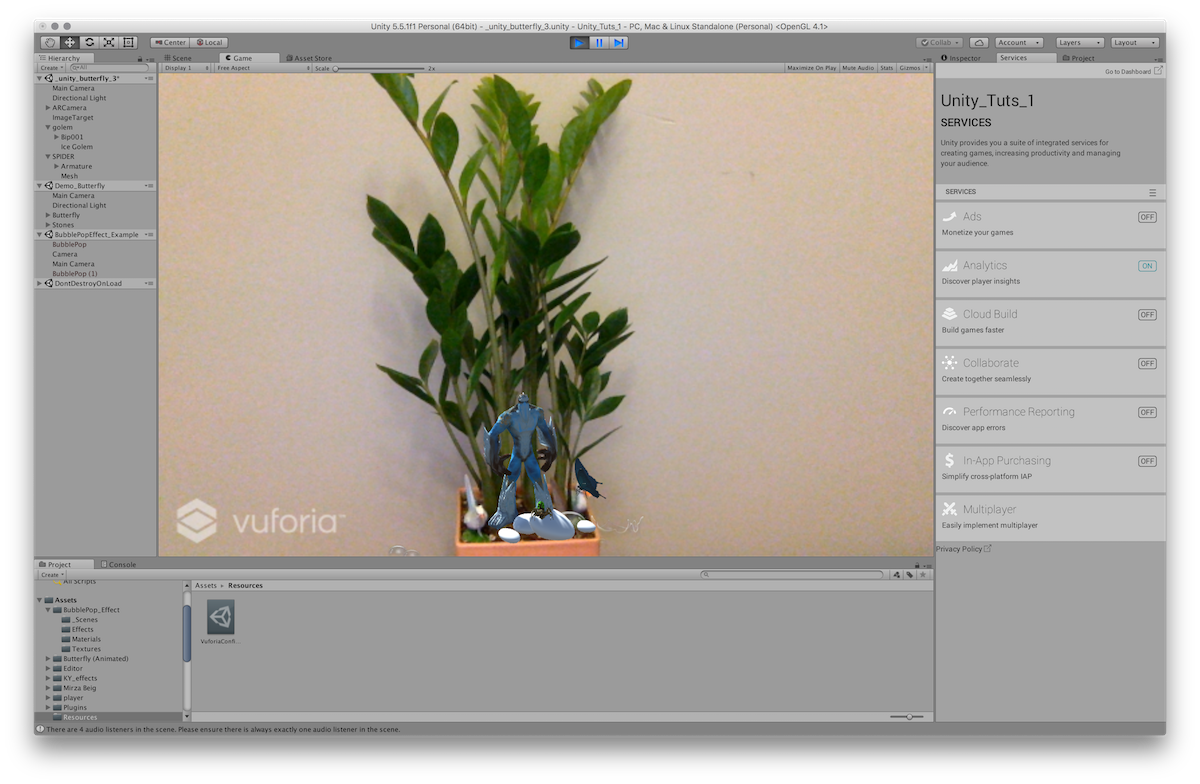
I did not have an access to a printer when I was doing the assignment, so I experimented on an actual object recognition instead, using a small plant in my room. Calibrating their positions was harder than I expected.
I also exported my mythical creatures to the iphone app following the tutorial link that you sent us >>> LINK . The tutorial was very helpful and straightforward.
The Golam and it's friends didn't want to show the first few tires.
After focusing and moving the phone in and out, they finally came out.
The golam and his friends are completely out of focus. I tried to hold the phone at the position of where I took the picture and used it for data set but it didn't help.
I also noticed that the animated butterfly and bubbles disappeared and there wass also an error shown in the xcode which I have no idea how to dubug....
The most difficult thing for me for this week's assignment seems to be the Unity's workflow but just like any other new programs or software, it takes time to learn.
1. Rock image I used before I changed to an actual tree.
2. Then I snap a photo of a tree to resize the creatures to the tree's scale.
3. A screenshot from the iphone.
MWMR: Class 01
Class 01 | Assignment Theme: BAAM! (Blended, Augmented & Mixed) reality. Intro, history, examples & exploration.
Tech: Projection Mapping 101
For this week’s projection mapping assignment I wanted to make swirling water and project on glasses or coffee mug to simulate twirling effect. The liquid's movement will be triggered when someone is near the mugs or maybe the speed of the spinning water can be controlled by the leap motion?
Unfortunately, I have come to realize that I was a bit too ambitious for someone who does not have any experience with projection mapping. I learned that the code needed to run on MadMapper must be done in processing and with syphon libraries which is also in processing, however, my sketches was done in p5.js (a sketch I did for Nature of Code class). It took me a while to adjust the code accordingly and not without help from a fellow ITPers Sebastian and Matt, the resident.
SYPHON
This syphon tutorial was very helpful bridging the 3 software altogether. The workflow became much clearer after reading this tutorial. >>> LINK <<<


Instead of the projecting onto coffee mugs, I used paper plates in the kitchen on the floor instead.
I wanted the particles to only be within the circle, but then I would have to adjust the code which now at this point I did not go back and adjust the code, because I wanted to play around and experiment with madmapper since this is the first time I’m using the software. I found it to be quite handy and very straight forward to use after watching few tutorials on youtube.
In terms of human interaction, I know that I’m still lacking on this part since the only human interaction I have is moving the mouse and the particles follow the mouse, but I’m very happy with the result!!
Also, I realized that the renderings in Syphon is different than in processing. As you can see (2 pictures below), there is no fading trails of the particles and I’m not sure why this happened.

The technical difficulties and connecting all the dots of all the things required was confusing but I'm very happy I was able to achieved this!
CODE
import codeanticode.syphon.*;
PGraphics canvas;
SyphonServer server;

Mover[] movers= new Mover[6000];

void settings() {
  size(600, 600, P3D);
  PJOGL.profile=1;
}

void setup() {
  canvas = createGraphics(width, height);
  server = new SyphonServer(this, "Processing Syphon");

  for (int i = 0; i < movers.length; i++) {
    PVector pos = new PVector(random(width), random(height));
    PVector vel = new PVector();
    PVector acc = new PVector();
    movers[i] = new Mover(pos, vel, acc);
  }
}

void draw() {
  canvas.beginDraw();
  canvas.background(0, 50);
  for (Mover mover : movers) {
    mover.update();
    mover.display();
  }
  canvas.endDraw();
  image(canvas, 0, 0);
  server.sendImage(canvas);
}
class Mover {
  PVector position;
  PVector velocity;
  PVector acceleration;
  float topSpeed=4;

  Mover(PVector pos, PVector vel, PVector acc) {
   position =  pos;
   velocity = vel;
   acceleration = acc;
  }

  void update() {
    PVector mouse = new PVector(mouseX, mouseY);
    this.acceleration = mouse.sub(this.position);
    this.acceleration.setMag(0.075);
    this.velocity.add(this.acceleration);
    this.velocity.limit(this.topSpeed);
    this.position.add(this.velocity);
  }

  void display() {
    canvas.stroke(255);
    canvas.fill(250, 80);
    canvas.point(this.position.x, this.position.y);
  }
}